
Mystic
During a recent visit to Mystic Seaport, I re-kindled my joy of viewing history and pretending to be in that historical moment as Jayne and I walked around. I was not expecting to do much other than record some history. It was a hot summer day and I handheld my camera which made for some soft-edged pictures. My original thought in attempting this was to add some captures to my Lightroom library for future composite use. However, when I got back home, I discovered that I was able to achieve some “history with mystery” to my satisfaction. Depending on the scene, for me, I use shadow to create just the right bit of mystery.
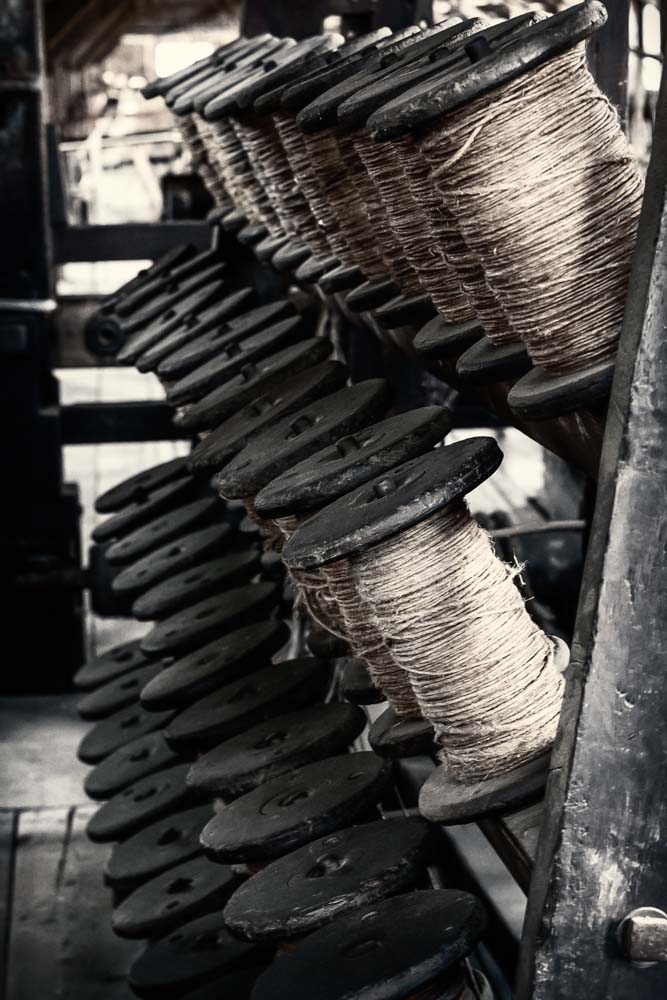
For example, in the image below I used my Canon 70-200mm 2.8 IS lens to capture this scene.
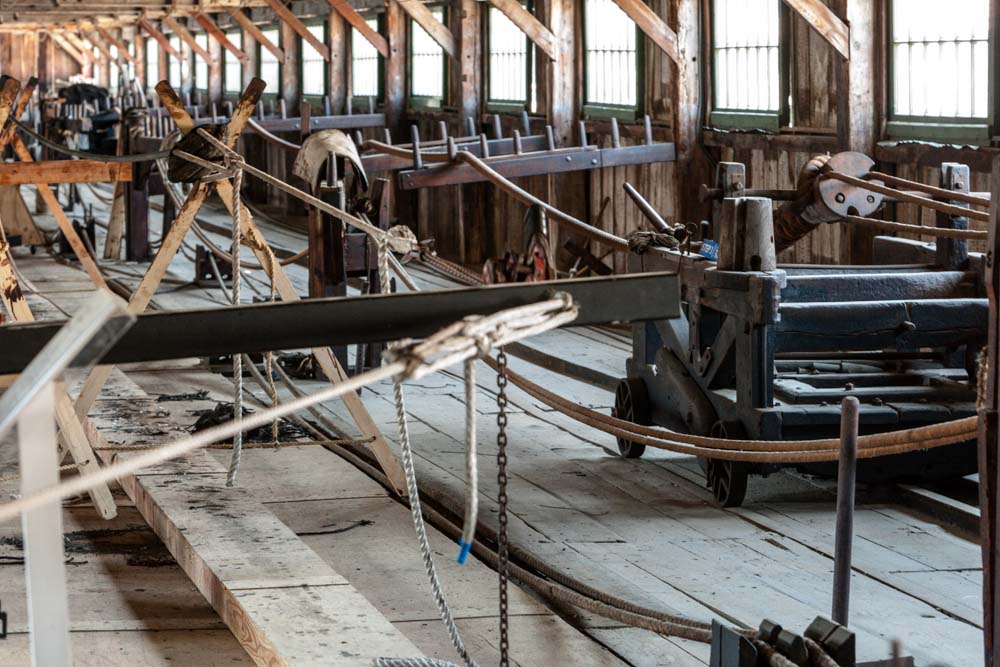
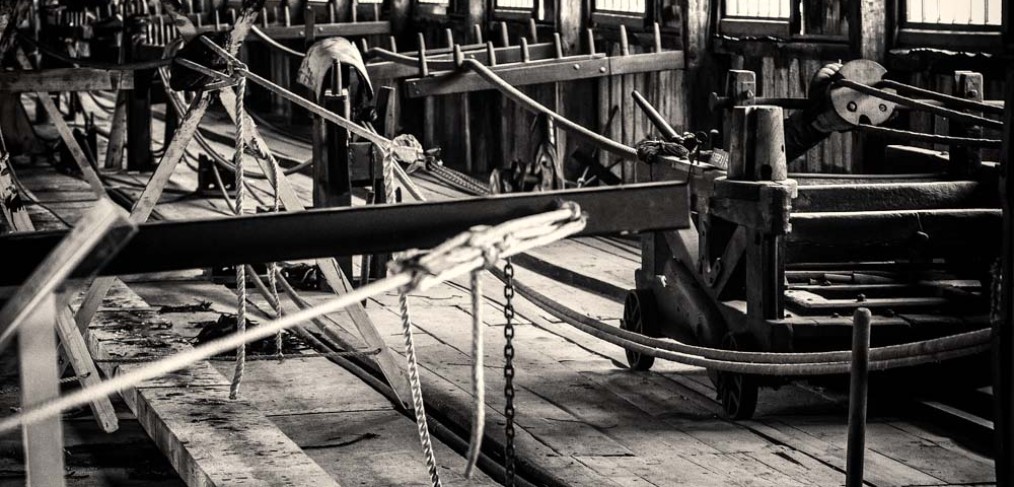
I used Lightroom to make my final image adjustments for color and contrast. The moment was recorded and added to my library for future use. On to the next image? Not quite! There is a lot of history in this room where whaling ships of old were built and maintained. Lives and livelihoods depended on the care and craftsmanship of products produced in this room. Was there a way for me to recreate that moment in time, that feeling, that emotion of what it must have been like to walk into this room to check on an item’s progress?
The result of my attempt to recreate this mood is found below.
For this purpose, I first used NIK Silver Efex Pro 2.0 to initially convert this image to black and white. Keep in mind that I first fully developed this image for color. This way I felt that I had optimized the details, lines and shapes, I wanted to exploit next.
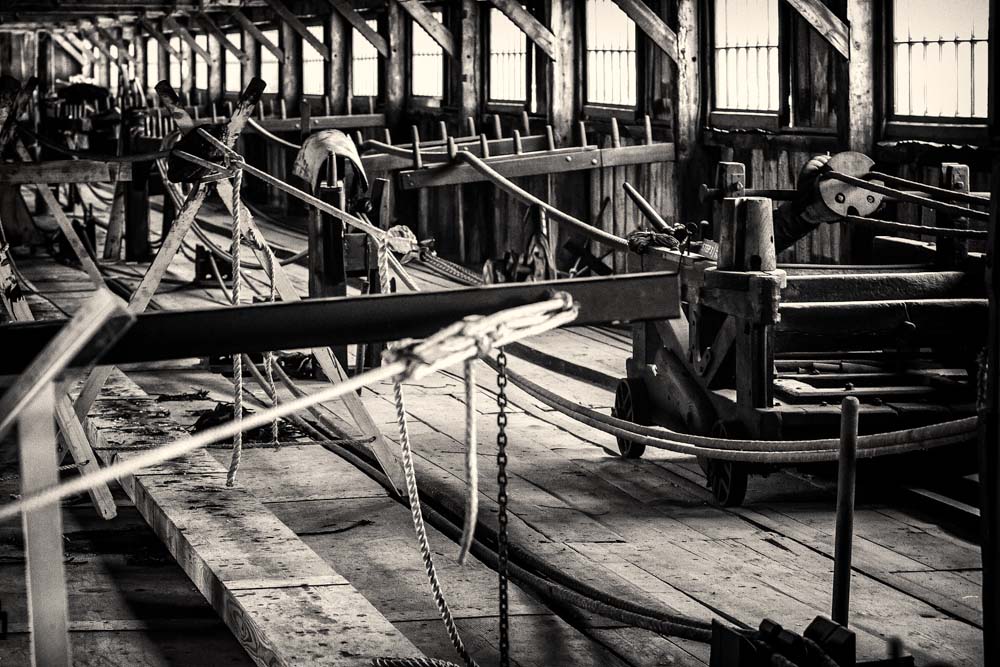
Once in Silver Efex, I used the 28 filter thumbnails of my imported image to find the best treatment starting point. These filter thumbnails are a great way to jump start your imagination! For my workflow, I opened my selected image in Photoshop CS6 from within Lightroom and then made a duplicate layer so I could do some before and after comparisons, if needed. This allows me to potentially leverage the additional power of Photoshop, if I need to after using Silver Efex.
Once you pick your treatment, then it is just a matter of fine tuning the effect. Each effect has a series of adjustments, very much like Lightroom has in the Develop module. Experimentation with many of these adjustments led me to my desired vision.
For this scene, once I completed work in Silver Efex, the result becomes a new adjustment layer in Photoshop. This allows me to do some before and after comparisons by simply turning the “eyeball” off and on for the new adjustment layer. Then if I need to, I can reduce the treatment effect by simply reducing this layer’s opacity.
When I feel my treatment is complete, I save the result first, in case I want to go back later and change something. But I usually flatten the layers here and then save this also as a tiff file which I can later tweak in Lightroom. I do almost all of my printing from within Lightroom, as well as the exporting to jpg for my website.
So, that’s it! Below is another before and after image using the same methods as above.
Enjoy!
Thanks for the comments, Jer! Also helps with the web spiders!
History with mystery. Nice concept! Nice photos. Nice explanations. Thanks!
Jerry